Acquiring Digital Forensics Evidence
As a digital forensics analyst, we should never work directly on the suspect hard disk drive. In this activity, we will use a built-in Linux command to duplicate the suspect disk. We will also use hashing to ensure data integrity. Next, on a Windows computer, we will use the file carving tools provided with the open source forensics suite Autopsy (sleuthkit.org) to investigate a disk image. We will open a pre-built case file and probe the information extracted to identify a malware installation event.
Use Linux to Create a Disk Image
A virtual hard disk drive containing possible evidence has already been attached to the PT1-Kali Linux virtual machine. We need to create a disk image, and then prove whether there have been unexpected changes to the file during the investigation. Linux contains a built-in tool named dd that can easily create copies of disks for forensics professionals. We will use dd to create an image. Next, we will use MD5 hashes to discover whether a file has changed unexpectedly.
The suspect 1GB disk is already attached to the Kali VM, so we run lsblk and use the output to record the name (sda) of the 1GB disk.
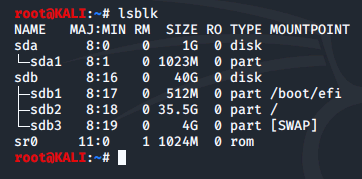
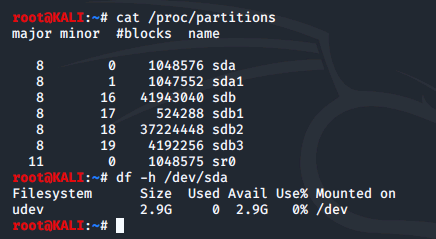
The following commands display disk information of the drive
Next we create a copy of the suspect disk. The image creation process takes a few seconds.

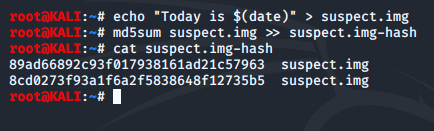
Running the md5sum command generates a checksum and we redirect it into a file named suspect.img-hash.

To mark today's date, we run the following command (we'll see why this isn't a good idea in the next step) and then use the md5sum command from the previous steps to hash the suspect.img file again, but this time, append the hash results to the existing suspect.img-hash file. We must be careful when entering the command as we can easily destroy the hash generated for the original suspect.img file. After using cat to view the suspect.img-hash file we can see that the hash values are no longer the same.
Now, why was it a bad idea to mark todays date the way we did? Below we can see that we accidently overwrote the entire file, hence the hashes are different. This is an example of how easy it is to lose evidence. Luckily, we still have the original content located at /dev/sdb and we can use dd to create another image file. Had we been working with the original disk content, it could have been destroyed.

Browse Forensics Case File
Opening the "Forensics – Marketing" case in Autopsy, and browsing the disk image that has been seized as evidence.
On our MS1 VM, we open autopsy and navigate to the Forensics - Marketing.aut file and open it.

Autopsy identifies many critical portions of the storage media for us. We briefly examine the following components:
- Expand the Data Sources node then select the marketing.vhd disk in the main pane. In the lower pane, select the Hex tab. This is the Master Boot Record, residing in the first 512-byte sector on the disk.
- Expand the marketing.vhd, and then select vol2. This is the system volume and is normally hidden from view. Observe that the initial string of hex characters identifies the partition type as NTFS.
Moving over to vol3, we expand the folders and navigate through Users > Viral > Downloads. We can see the symbolic links for the current directory and parent directory, but there are no download files present.

Autopsy also displays drive contents. We can examine the following results:
- Under the Results node, select the EXIF Metadata node. Criminal investigations might need to locate images of illegal activity. This search has only located the default Windows backgrounds, though.
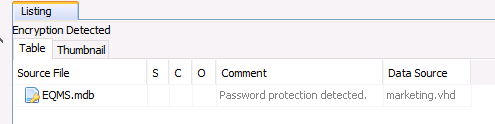
- Under the Encryption Detected and the Encryption Suspected nodes. The presence of encrypted files in suspect locations could be a red flag.
- Under the Installed Programs node. We can sort by the Date/Time column to display what has been installed recently.
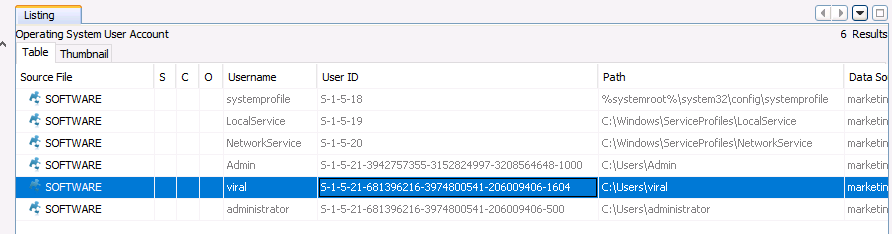
- Under the Operating System Information and Operating System User Account nodes. We can select Viral's user account for more information on a per-user basis, and we see Viral's SID ends in 1604
If we continue examining the results from automated analysis of the drive:
- Under the Web History node. We could display information about web browsing habits in this node.
- Under E-Mail Messages. We could find some valuable information here.
- Under Interesting Items. There are numerous references to an "atypical" compression file format (not native to Windows, that is) within the carved files area (that is, typically files that have been deleted).
Browse Activity Timeline
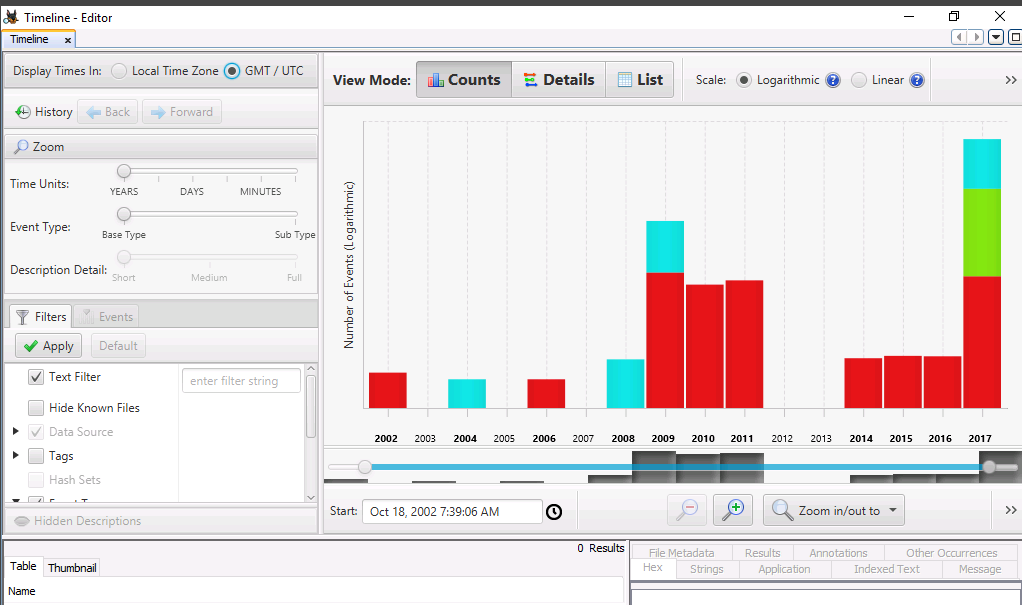
We can right-click a bar and select Zoom into Time range. We do this on the 2017 bar until we reach April 29th at 2pm.
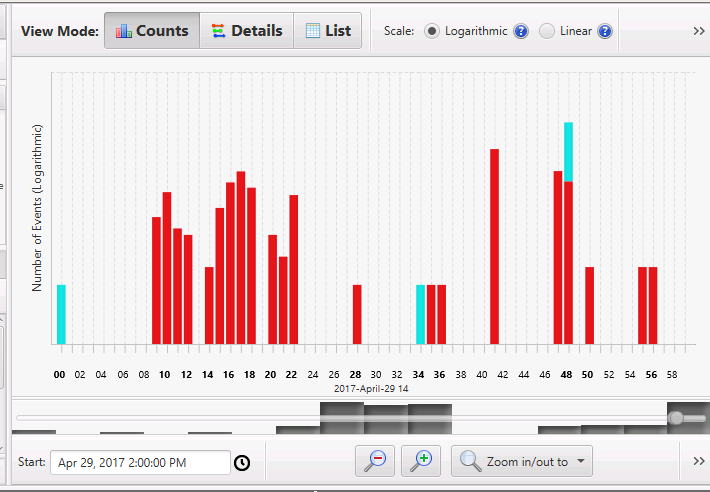
Changing over to list view, we can view various events. At 14:48 we can read the content of the email from Viarl and we see that viral was tricked into installing malware from an untrusted website.
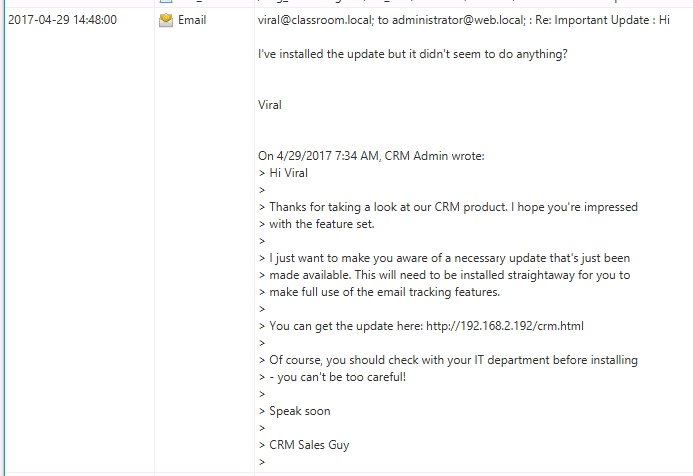
To extract this message, we right-click the message, choose Extract File(s) and save it as the default file name on the desktop.
Conclusion
This lab aimed to test and improve the understanding and application of digital forensics and security assessment tools. We began by emphasizing the importance of not working directly on the suspect hard disk drive and instead using a built-in Linux command to duplicate the suspect disk. Hashing was also used to ensure data integrity. The next part of the lab involved using file carving tools in Autopsy to investigate a disk image and identify a malware installation event. Through this lab, it became evident that working directly with evidence can cause damage, emphasizing the importance of the correct tools and procedures.
Viewing the timeline of file activity might also help to reconstruct the pattern of events. At the top of the Autopsy application we click on Timeline and change the Display times to GMT/UTC for this lab.
0 Comments Add a Comment?