Intercepting and Interpreting Network Traffic with Packet Sniffing Tools
In this activity, we used Wireshark and tcpdump to capture network traffic and display relevant information on the local network. Interpreting the output from such captures is useful for security assessments.
Sniffing Network Traffic
To begin, wireshark is used and set up with the eth0 adapter selected and using the ip filter.
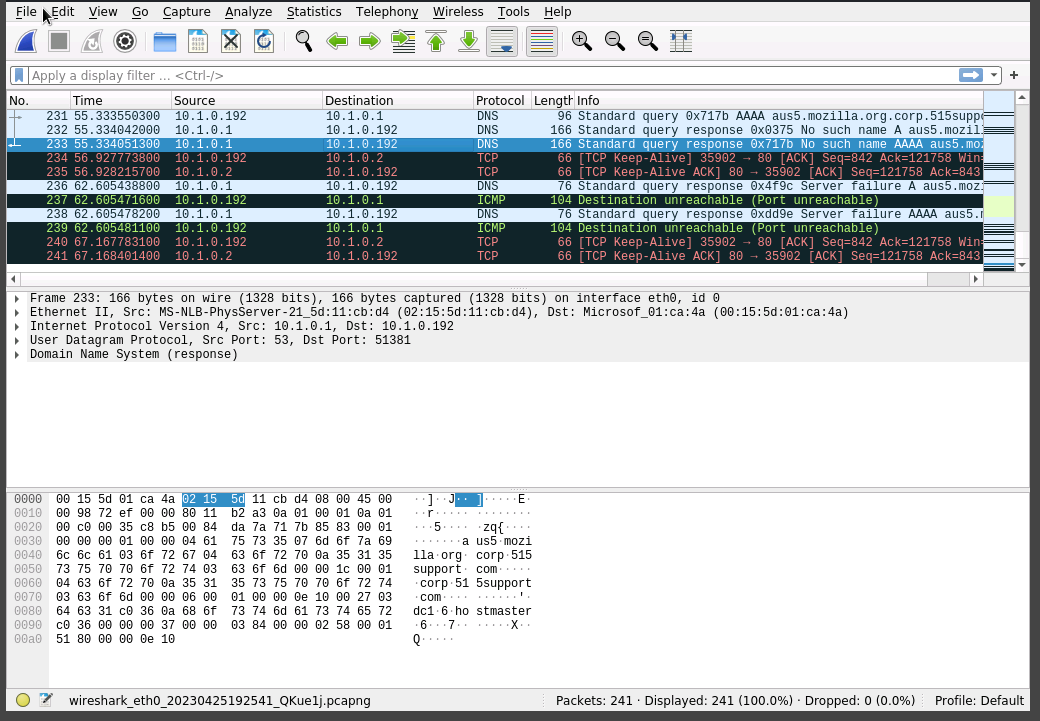
Firefox is then used to access the MS1 Windows web server. As soon as the web page is displayed we move back to wireshark stop the process and see the following:
This information can be useful for both security and network troubleshooting scenarios.
Wireshark splits out the successive headers and payloads to decode each protocol:
- Frame—this shows information about the bytes captured.
- Ethernet II—this shows the frame type (data link layer/layer 2) and the source and destination MAC addresses. Note that the first part of the address (the OUI) is identified as belonging to Microsoft (all the VMs are using MS virtual adapters). The last piece of information is the type of network protocol contained in the frame (IPv4).
- Internet Protocol Version 4—This is the IPv4 datagram, notably showing the source and destination IP (layer 3) addresses. Note there is usually also a GeoIP function in this section, but as these are private addresses, they cannot be resolved to a particular regional registry or ISP.
- User Datagram Protocol—layer 4 (transport) uses either UDP or TCP. The most significant fields here are the source and destination ports. UDP port 53 is the "well-known" DNS server port.
- Domain Name System—this is the application protocol. Depending on which frame you selected, you may be looking at a query or at a response.
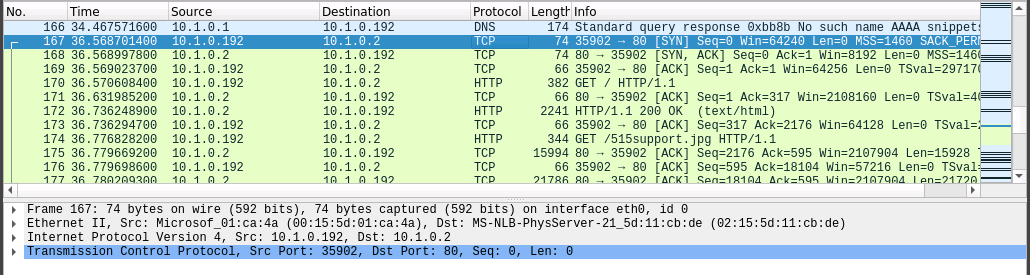
The first TCP frame that is colored green shows us the connection to the web server. Here we can see:
- The MAC address
- The IP addresses
- The source and destination port numbers
Using tcpdump to intercept HTTP network traffic
The tcpdump program is another protocol analyzer (packet sniffer).
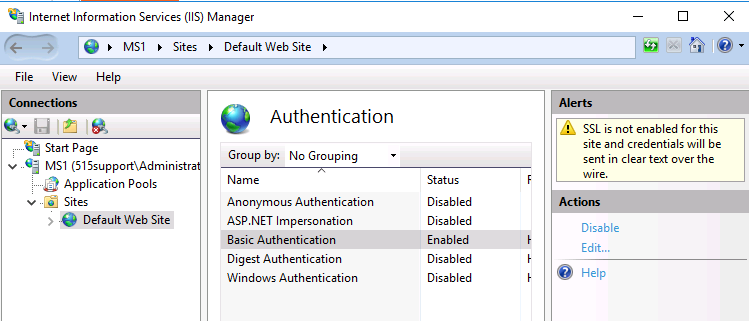
To begin, we’ll be moving into Server Manager > Tools > Internet Information Services (IIS) Manager and expanding the MS1 node to display the Default Web Site node. From there we double-click the Authentication applet and do the following:
- Disable Anonymous Authentication
- Enable Basic Authentication
Now that the set up is complete, we move onto our Kali machine and open up the terminal. Next we use the following command:

Note: we will not see captured frames in the terminal output. The -w switch directs output to a capture file
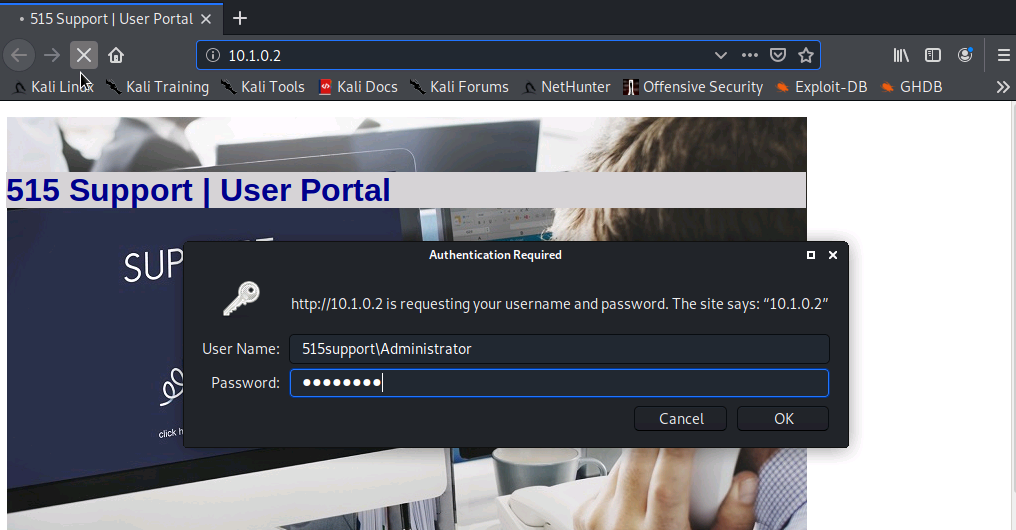
We are prompted to enter the username and password
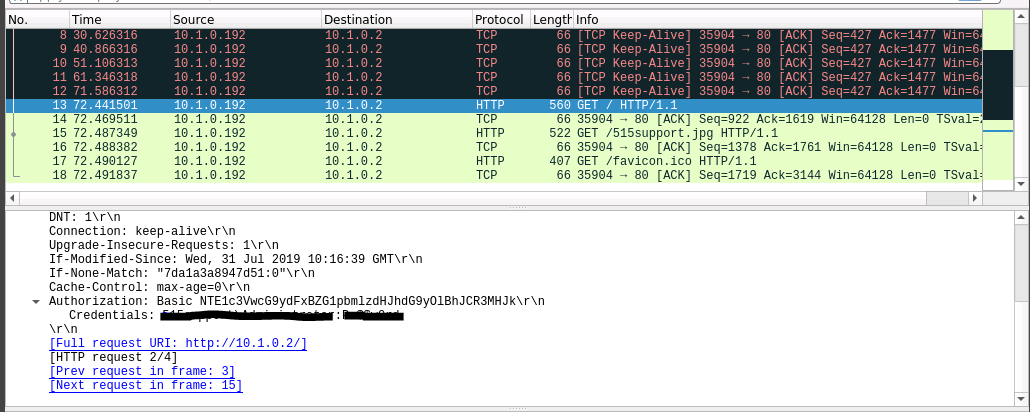
After the username and password have been entered, we switch over to the terminal and use Ctrl+C to end the tcpdump capture. Then we switch back to wireshark and open the www.pcap file we created with the command we used earlier.
We then select one of the GET HTTP messages, expand the Hypertext Transfer Protocol in the middle panel and we can see the option to expand the Authorization info.
Expanding Authorization shows us the username and password inputted in plain text.
Using tcpdump to intercept SSH network traffic
In this next section, we use tcpdump to intercept SSH network traffic and attempt to display the contents of the traffic. We will use an SSH connection to the 10.1.0.10 IP address. This address is assigned to an LX1 vm.
Here we start by opening the terminal on our Kali machine and run the following command:

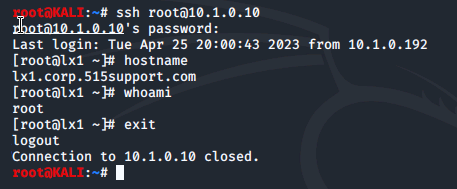
Then, in a second terminal we connect into the LX1 machine using ssh. Once logged in, we run the hostname and the whoami commands then exit the connection.
After returning to the terminal running tcpdump and ending it with Ctrl+C, we turn to Wireshark and open the ssh.pcap file we created.
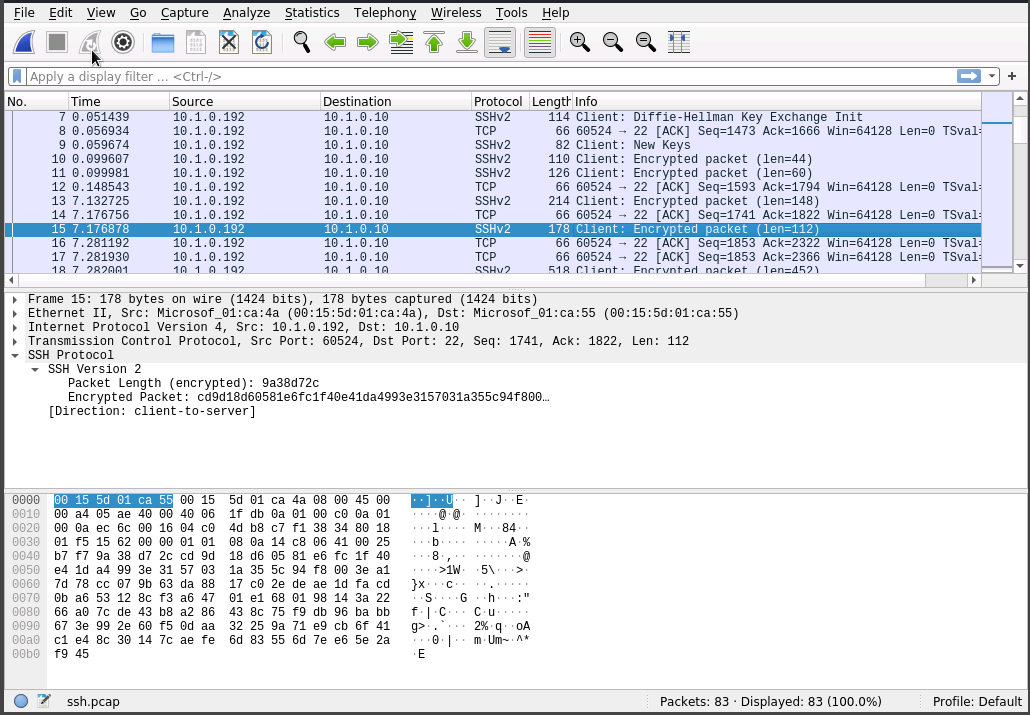
One of the differences we notice here is the port numbers. When using HTTP we could see port 80 was in use. Now that we are using SSH we see port 22 in use.
We also can no longer find any authentication credentials.
In Conclusion
In this lab, we used Wireshark and tcpdump to capture and analyze network traffic on a local network. The purpose of this lab was to assess organizational security by identifying potential security risks through the captured network traffic.
Overall, this lab was a great learning experience and helped me gain practical knowledge of how to capture and analyze network traffic for security purposes.
0 Comments Add a Comment?