Configuring an Intrusion Detection System
In this activity, we will use an IDS sensor to monitor packets on a LAN router's interface with the outside internetwork. We will use the Security Onion Linux distribution (securityonion.net) and its bundled Snort IDS as the sensor. Security Onion is installed to the SIEM1 VM.
As we cannot access the relevant configuration settings in this lab environment, the IDS sensor has already been configured for us. The eth1 interface on RT1-LOCAL is configured as a source port for mirroring. The eth1 interface on SIEM1, also connected to the vISP switch, is the destination port. This interface has no IP address. It is used as a monitoring sensor only. SIEM1's eth0 interface is connected to the vLOCAL switch. This interface does have an IP address. It can be used to manage the appliance from the local network.
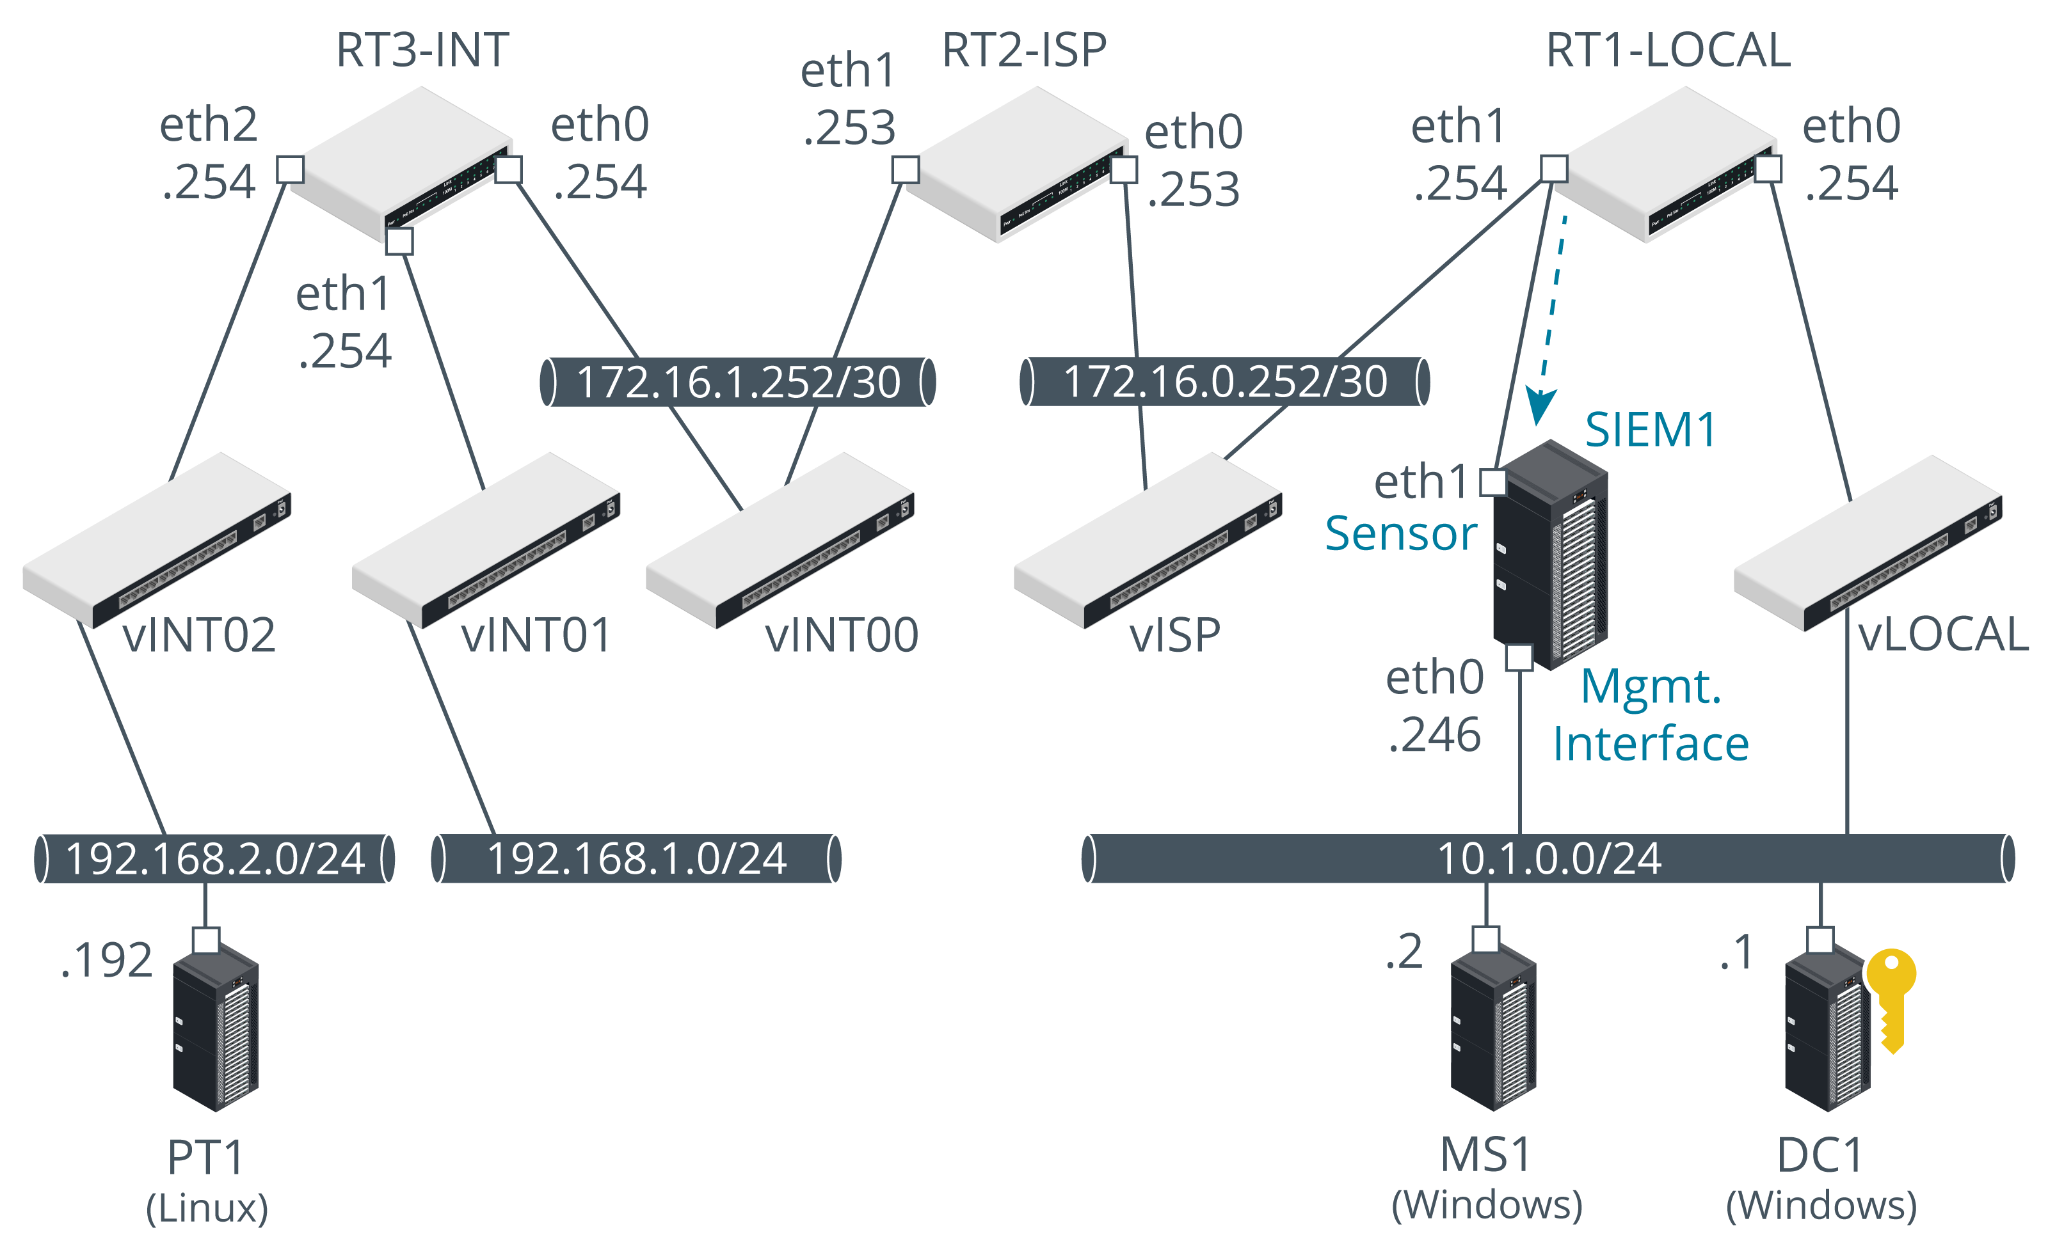
The PT1-Kali VM is located on a remote network, representing the internet. Packets directed at the VMs on the vLOCAL "LAN" are routed via RT3-INT, RT2-ISP, and RT1-LOCAL.
Browse IDS Tools
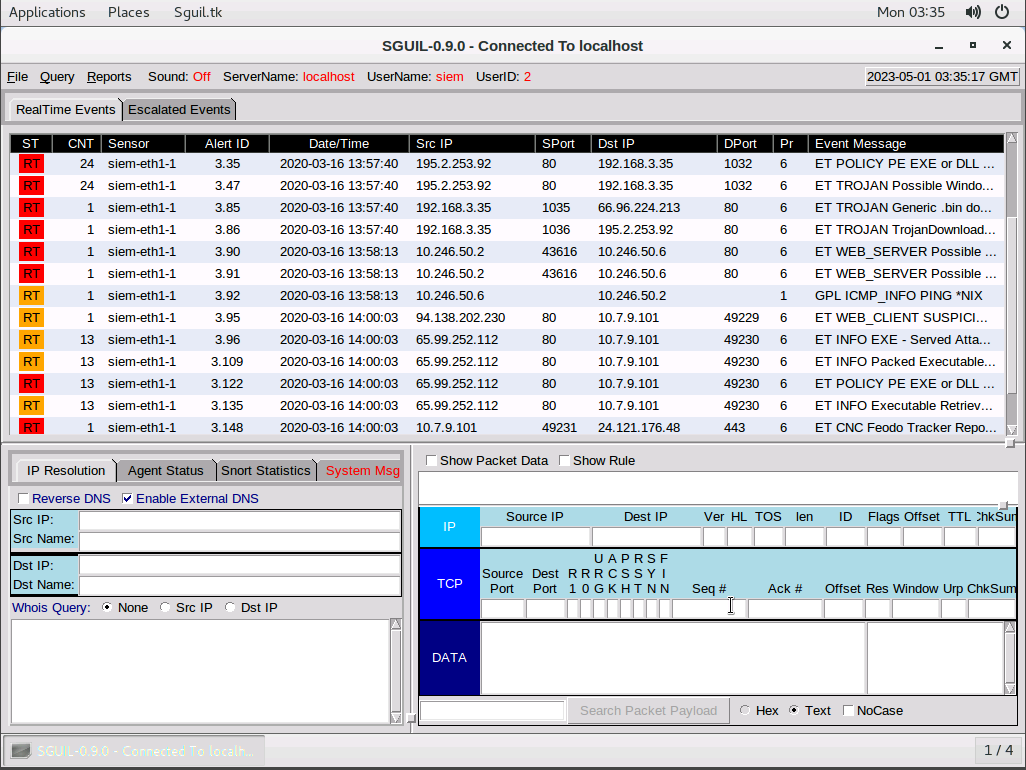
We'll start by running the SGUIL tool, which is used to monitor incidents in real-time. After logging on with our credentials, we'll check the siem1-eth1 interface check box and then start SGUIL.
Observe that a number of alerts are already present in the console. These show samples of malicious traffic. We will not be analyzing these as part of this lab.
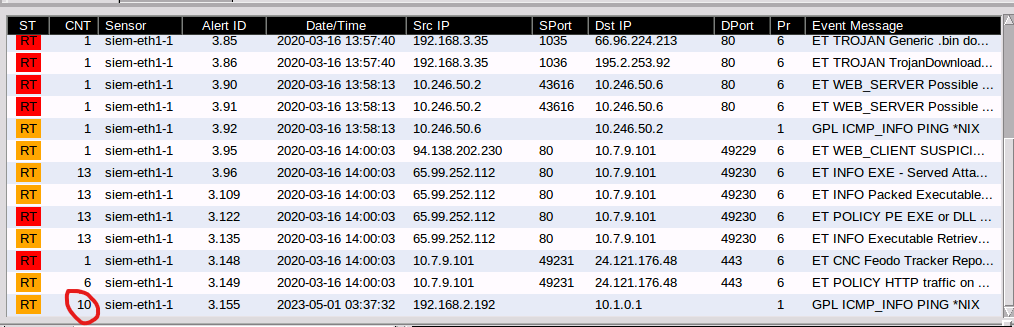
Next, we'll switch over to our Kali VM and ping 10.1.0.1 -c10 using the terminal and then switch back to our SIEM VM.

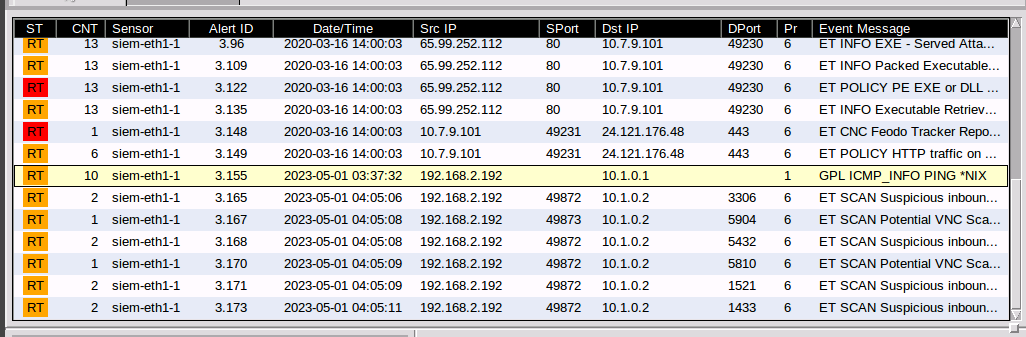
The probes will be shown as a new "GPL ICMP_INFO" record in the console. Note the CNT field. This shows that the rule was matched 10 times. We'll be selecting that record.
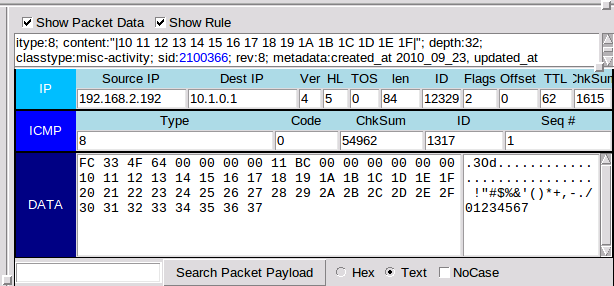
In the panel in the bottom-right, we check the Show Packet Data and Show Rule check boxes to show the packet contents and the rule that produced a signature match for this event. We'll record the rule SID (it appears in blue).
Configure IDS Rules
When rules generate events that we decide you do not need to inspect manually, we have several choices:
- We can configure SGUIL to autocategorize the event.
- We can tune the ruleset to remove the rule.
- We can apply a threshold to only alert if the rule is matched a certain number of times.
- We can add conditions to trigger (or not trigger) the rule.
To continue this activity, we will disable the rule that alerts on ICMP matches. To do this, we will modify one of the configuration files for the Pulled Pork script, which updates Snort rulesets.
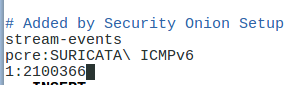
To start, we'll use vim to open up /etc/nsm/pulledpork/disablesid.conf and type in the SID we recorded earlier.
We then run sudo rule-update to apply the change.
Back on our Kali VM, we run the same ping again but just 4 times and then move back to our SIEM VM. Here we can see that no alerts have been generated. the last alert was the same one we saw last time with a CNT of 10.
When we edited the disablesid.conf file, we disabled a rule that identifies ping packets based on the specified SID. We can edit rules to ignore information that SGUIL discovers if we do not need that information.
Test IDS
Next, we'll run some intrusive pen tests from PT1-Kali and identify the events they generate in the IDS. We'll start by running a basic nmap scan on 10.1.0.2. On our SIEM VM, it takes a few moments for the scan to apear in IDS. The scan triggers several alerts both for probing sensitive ports (such as the ports for various SQL application servers.)
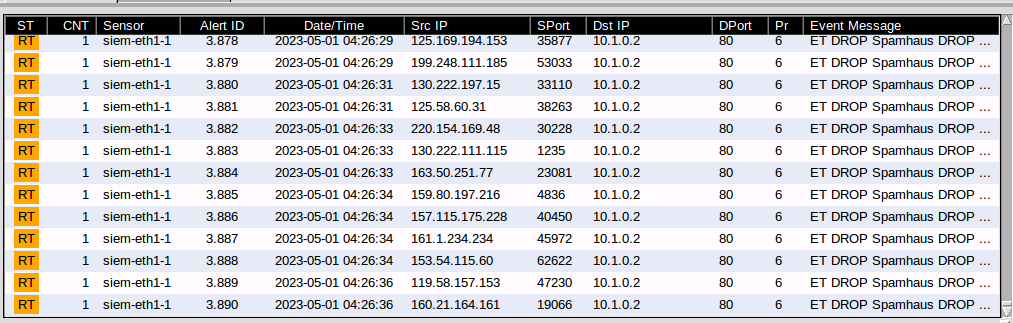
We'll switch back to our Kali machine and perform a quick DoS attack with the following command. After the command, we can see the rules the attack is triggering. The event messages display ET DROP Spamhaus DROP messages.

While the flood is not identified per se, some of the randomly generated IP addresses are on Spamhaus' Don't Route or Peer (DROP) netblocks.
Attack the MS1 Windows Server
The moment we've all be waiting for. Here, we'll take a look at what a DDos attack looks like on a virtual machine.
We'll start by opening up the performance tab in Task manager and selecting Ethernet to display network traffic. (There is little to no traffic at the moment.)
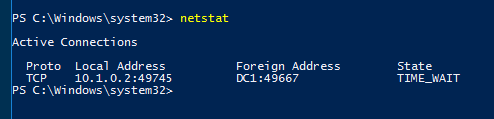
While running Powershell as admin, we perform the netstat command and see very few connections.
Now, we'll switch back to our Kali VM and perform the same hping3 DDoS attack. Moving back to our MS1 VM, we take a look at the network traffic.
The network throughput should remain at approximately 100%. However, it is possible that the attack is effective enough to stop Task Manager from displaying updated information. The MS1 system first blacks out and then appears to be locked.
We try to select the PowerShell window and attempt to re-run the netstat command, but it doesn't even execute.
We move back to our Kali VM and stop the attack. Then we move over to our SIEM VM and observe that the attack times correspond with the time we ran the above commands.
Why are the Src ip addresses all different in the SGUI if the attack originates from the Kali VM at 192.168.2.192? Because the hping3 utility randomizes and spoofs the source ip address, based on the --random-source parameter.
Conclusion
Through the use of the SGUIL tool, we were able to monitor incidents in real-time and disable a rule that identified ping packets based on the specified SID. We also observed how rules generate events and had the opportunity to analyze malicious traffic that had been detected previously.
The lab also presented us with an opportunity to perform some intrusive pen tests and observe the alerts generated by the IDS.
0 Comments Add a Comment?