Analyzing the Results of a Credentialed Vulnerability Scan
In this activity, we will explore the capabilities of the OpenVAS (openvas.org) vulnerability scanner and analyze scan reports.
Run OpenVAS Scanner
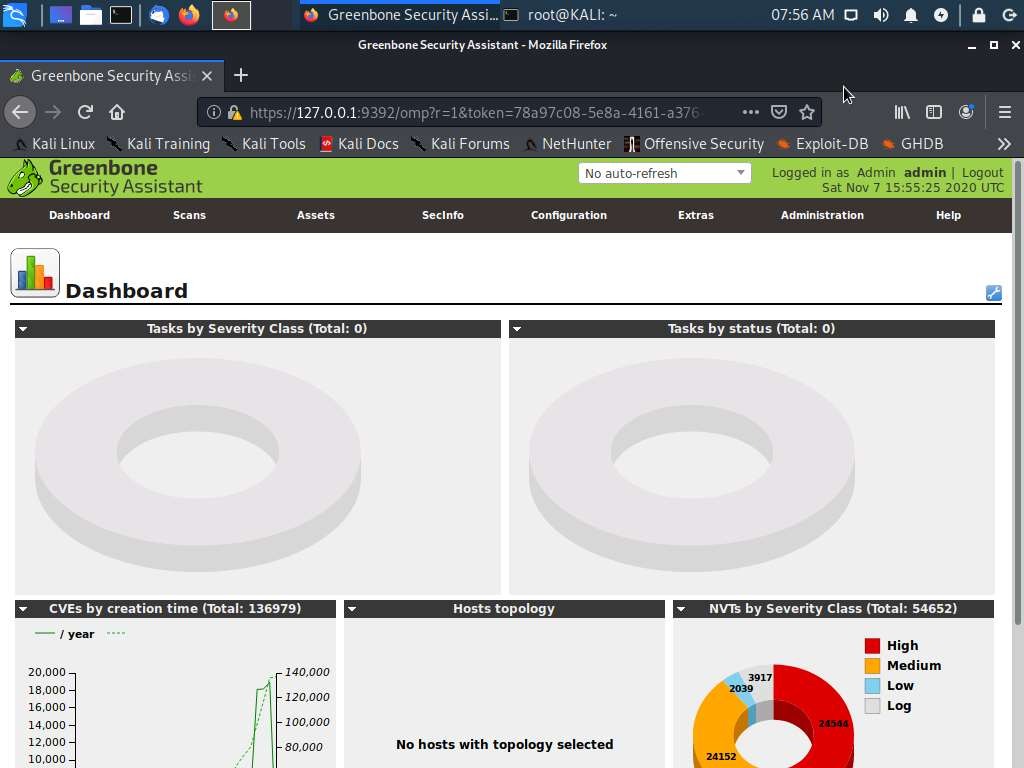
OpenVAS can be managed using a web application called Greenbone Security Assistant. On the KALI VM, we'll start the OpenVAS services and log on via the web application.

After one to two minutes the Firefox browser automatically launches and it connects to https://127.0.0.1:9392
At the security warning, we accept the risk and log in. Now we have access to Greenbone Security Assistant.
Configure Credentialed Scan
We'll use a credentialed scan to get a detailed report and use the Configuration menu to configure a new credentials object.
From the configuration menu, we'll select Credentials. Then select the blue star icon on the left to open the New Credential Web dialog box, use the following details, and click create.
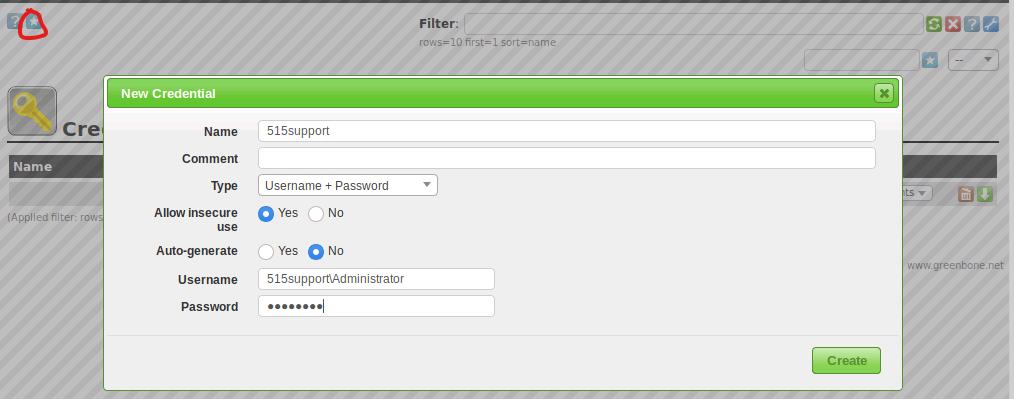
Vulnerability scans should not use administrative privileges such as the Domain Administrator account used in this activity.
Credentialed scans use dedicated logon accounts that have audit or read-only privileges. They also rely on administrative access to resources, they can prove deeper to detect vulnerabilities.
Non-credentialed scans publicly available information and provide less detail than credentialed scans.
Configure Scan Target
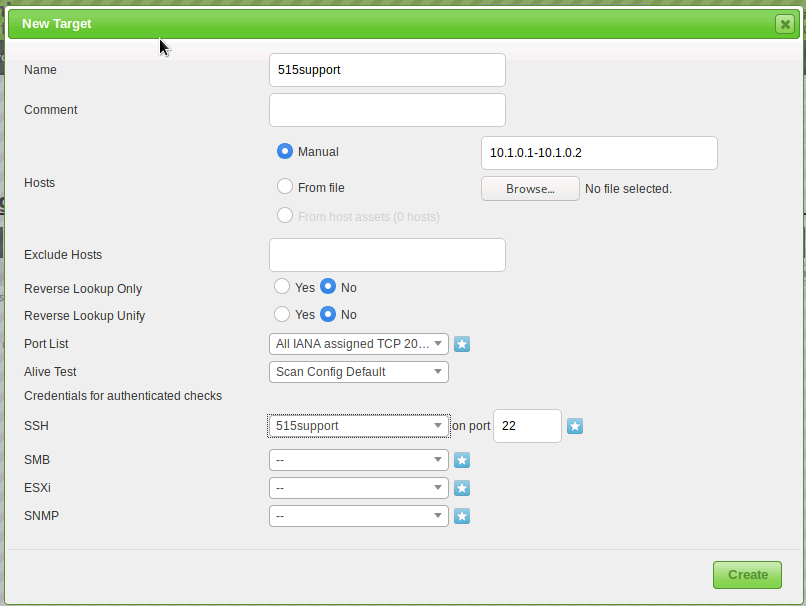
The scan scope is the range of hosts or IP addresses that will be assessed, we'll create a task to scan Windows servers. From the configuration menu, we'll next select Targets. We'll click on the blue star again and use the following details.
Vulnerability scanning can be disruptive so it is more typical to schedule it for out-of-office hours. On a production network you may also need some mechanism of powering on computers remotely.
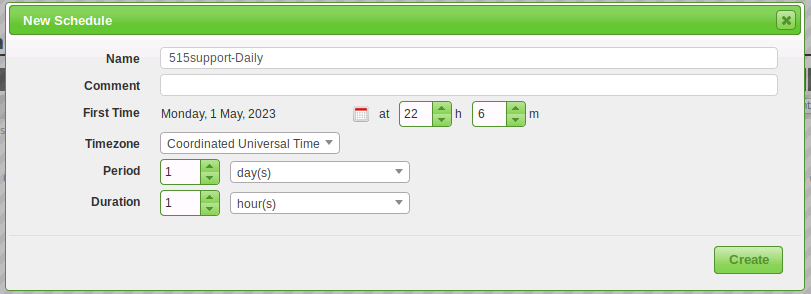
Now we'll configure the scan to run on a set schedule. Moving to Schedules in the configuration menu we select the blue star icon and use the following details.
Configure Scan Schedule
We'll run this task manually to ensure that it works as expected. Under Name at the bottom of the screen, we'll select the 515support-Full and Fast-Daily task. Then, we'll select the green start button at the top.
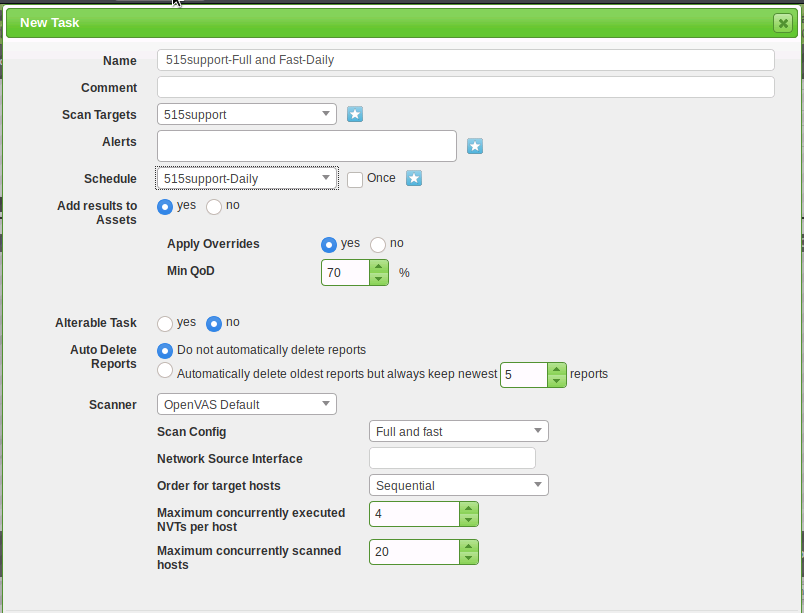
Next, we'll create a task object to complete the configuration, and then run the scan task. Under the Scans menu, we'll select task and use the following information:
Configure Scan Task
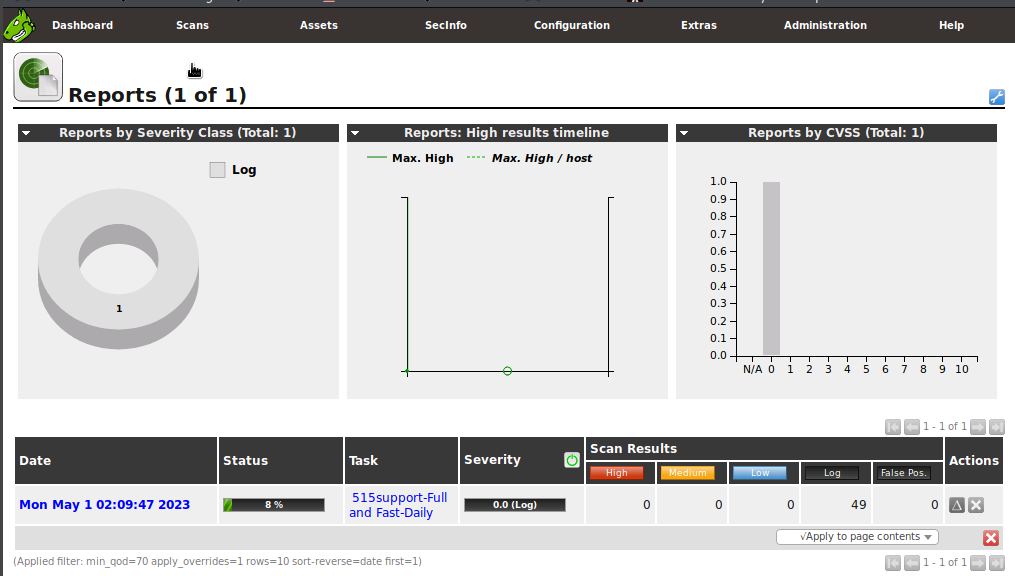
We'll need to let the scan run for three to four minutes for it to begin generating reports. Once we've given it enough time, we'll click Scan > Reports. This screen can be used to monitor the status of tasks and preview scan results even if the task is not complete.
Browse OpenVAS Scan Report
In the date column at the bottom of the Reports page, we'll click the task with today's date to view the results.
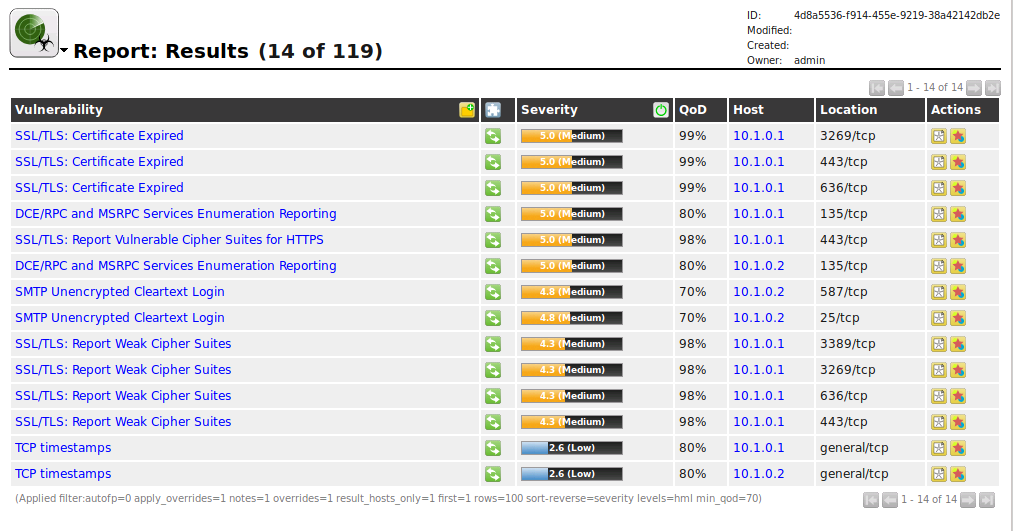
From the small triangle pull down menu by the Report:Results title, we'll choose Report:Hosts to display the discovered hosts and their related vulnerability information.

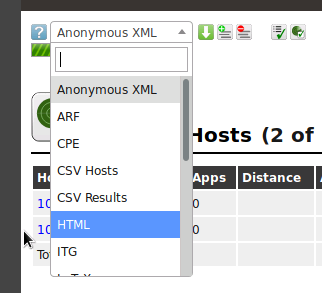
We'll save these scan results as a compliance check report as part of a security audit. In the pull-down menu at the upper left of the page, we select HTML(the menu currently reads Anonymous XML), and then select the green Download filtered report button and save the file to the default downloads folder.
Now that we have begun a scan, we need to let it run for a three to four minutes. We can open the report results, even if the scan is not complete.
From the No auto-refresh box in the green header bar, we'll select Refresh every 30 seconds. We'll let the scan continue to execute while we complete the next step.
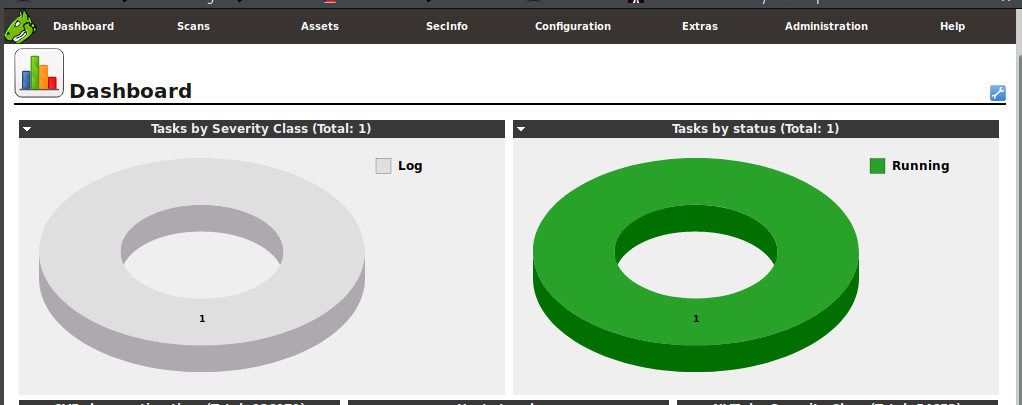
Moving back to the dashboard, we can see that the scan is running.
Conclusion
This lab provided a hands-on opportunity to explore the OpenVAS vulnerability scanner and analyze scan reports.
We were able to successfully configure a credentialed scan using a dedicated logon account with audit or read-only privileges and create a task to scan Windows servers on a set schedule.
We also learned that non-credentialed scans collect publicly-available information and provide less detail than credentialed scans, which rely on administrative access to resources to probe deeper and detect vulnerabilities.
0 Comments Add a Comment?