
Understanding Scan Output
In this lab, we'll be performing a vulnerability scan on our target and analyzing the output of scan results.
Run Nmap Scan
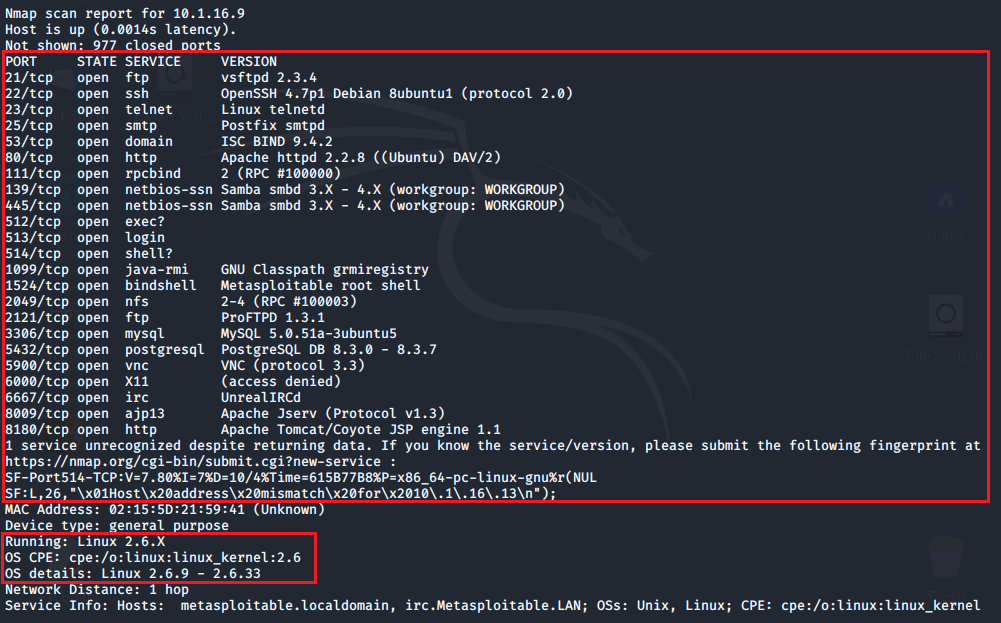
We'll use Nmap to gather detailed information on our target. The results of the scan will provide detailed information based on the options chosen. The output should produce the following.
OS Fingerprinting: By taking advantage of the unique TCP/IP stack implementation of each OS vendor, Nmap sends crafted TCP and UDP packets to the target. The response is then compared to a database nmap-os-db. This database contains known answered signatures (fingerprints).
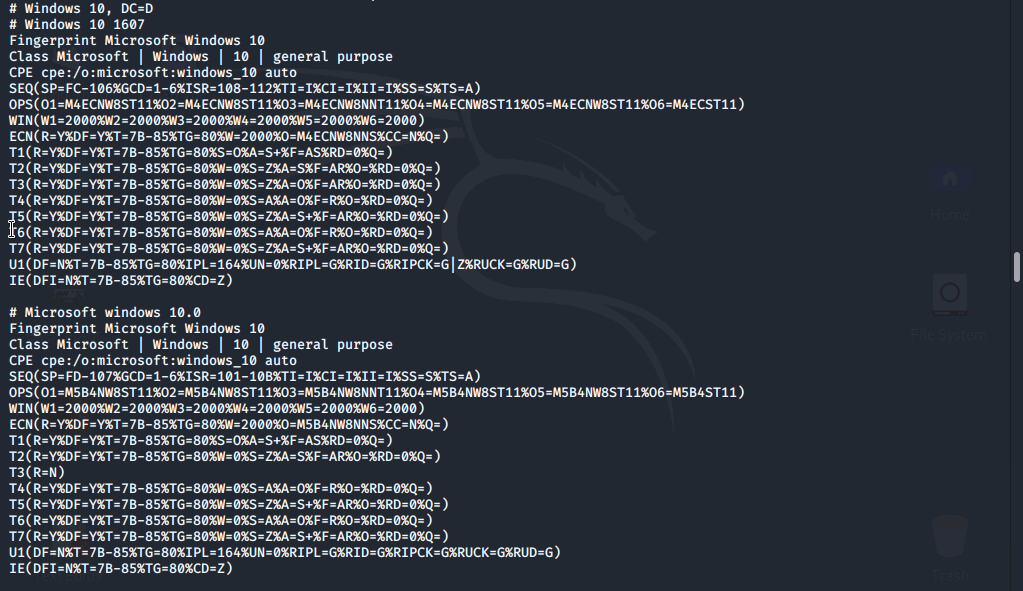
Here is an example of Windows 10 signatures from the nmap-os-db.
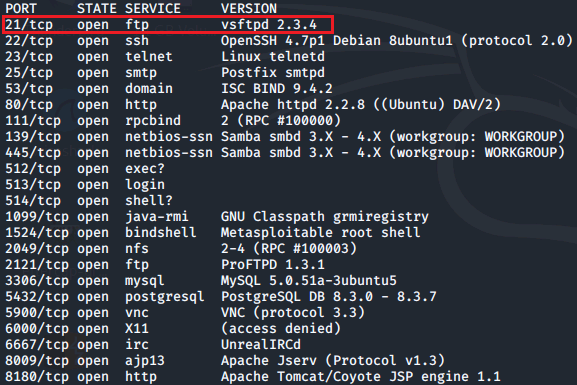
Service and Version Detection: In order to identify a server vulnerability an accurate accurate version number is needed. The primary use of nmap is port scanning. Adding the -sV [option] nmap will detect the versions of services running and output them directly to the right of the service.
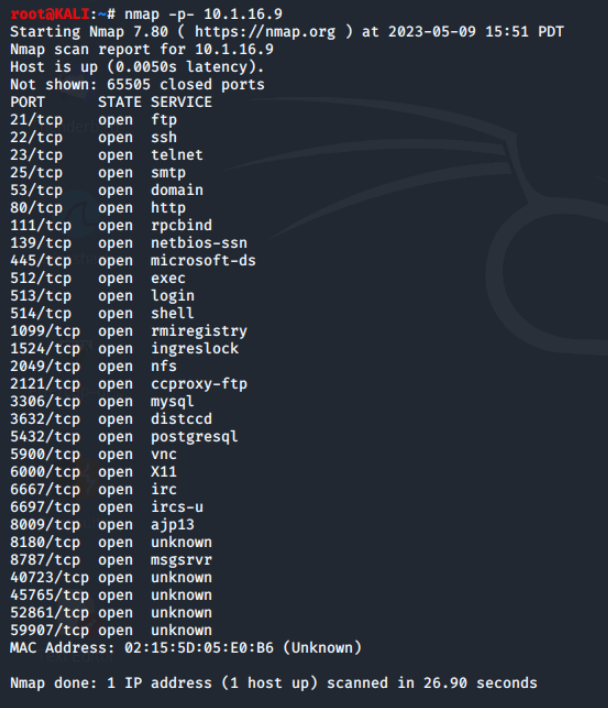
Now, to begin we'll open the terminal and run a command to identify all open ports on Metasploitable2.
Using Redirection Operators
When we run the nmap command the output displayed on the screen after it runs is called the interactive output. Using redirection operators we can change the standard input/output (stdin/stdout), such as to a file or another process.
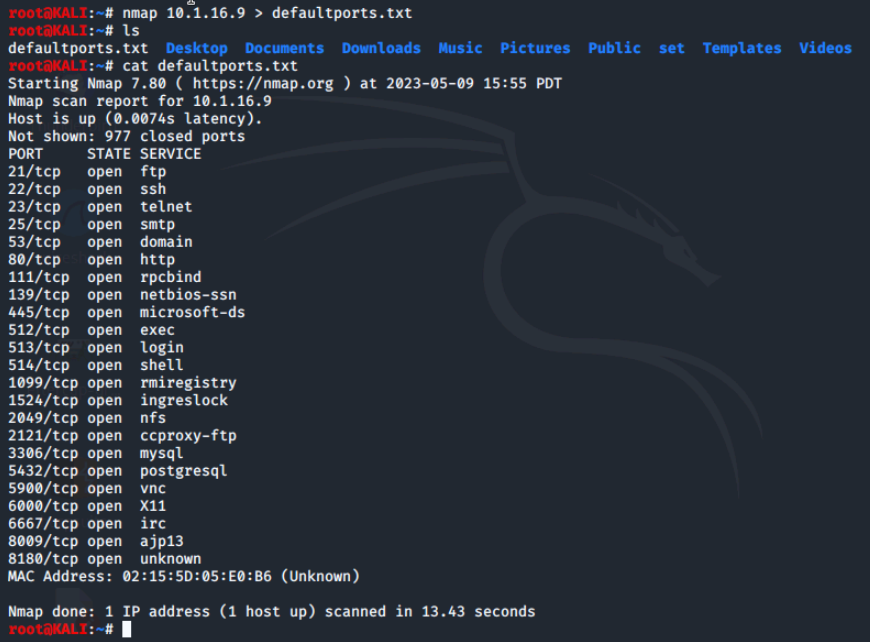
An example of this would be using the > operator to redirect the output to a text file. We'll perform a default scan of the Metasploitable2 VM and redirect it to a defaultports.txt, then list and view it to confirm it's existence.
Now, we'll redirect the output again, but this time we'll be scanning all the ports. Since we're scanning all the ports, this may take longer than the default scan.

Now we'll navigate to our Documents folder and run the diff -y -d defalutports.txt allports.txt command to output the difference between the two scans.
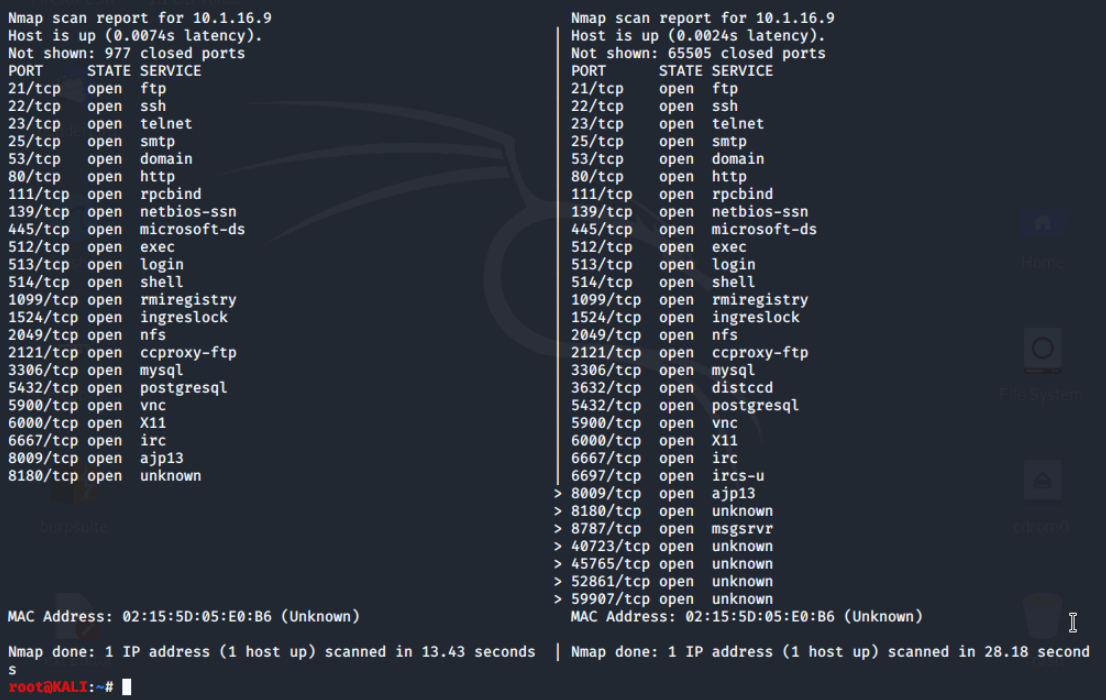
The diff command compares the differences between two files - line by line. By adding these two [options] to the command we are able to change how the output is displayed.
- The -y option outputs the file difference in two side-by-side columns.
- The -d option is used to find a smaller set of differences.
Nmap Output Formats
Nmap scans can often be confusing, so there are multiple output format options available to create an easy to read report. Here we will demonstrate how to output the nmap scan to an .XML format and then convert to an .HTML format.
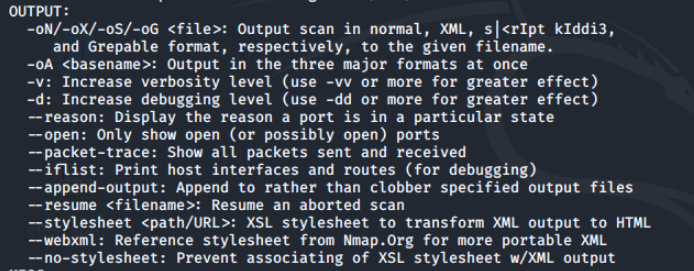
By typing in just nmap in the terminal, we can see the list of options we have available for nmap. Scrolling down to the output section we see all the output formats.
Let's run an Nmap vulnerability scan on the Metasploitable2 VM and save it as an .xml file, then list it to confirm its existence. This may take a while. (You can click enter to monitor it's progress)
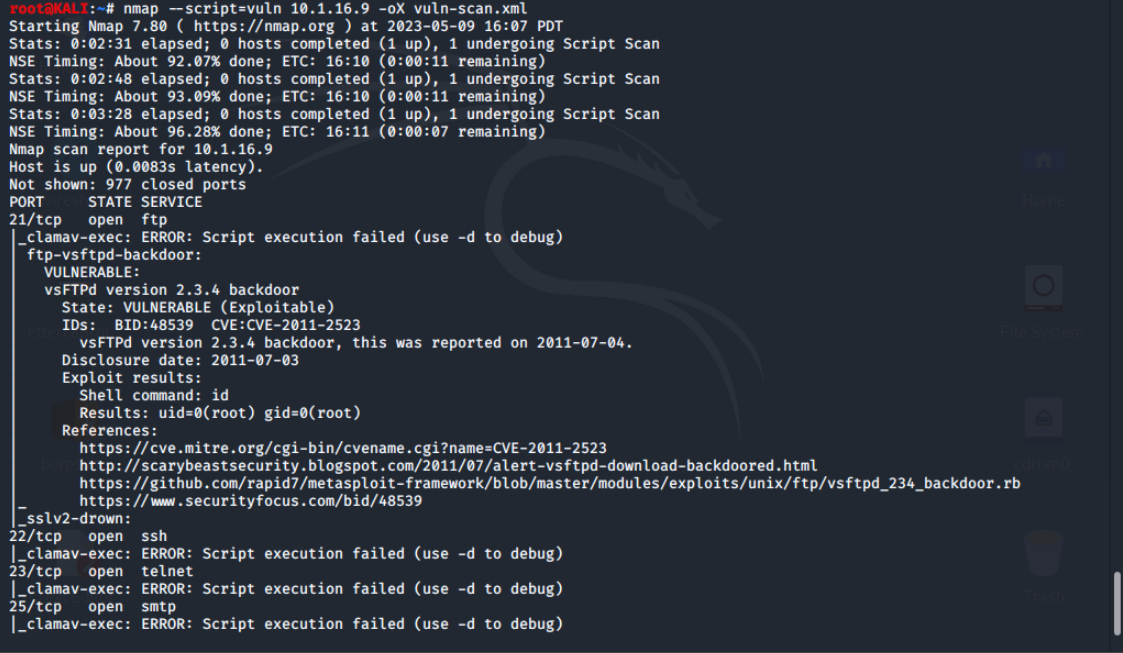

Next, we'll convert the .xml file into an .html file so that the nmap output is in an easy to read HTML format. We'll use the commands xsltproc vuln-scan.xml -o vuln-scan.html to convert it and firefox vuln-scan.html. To view it.
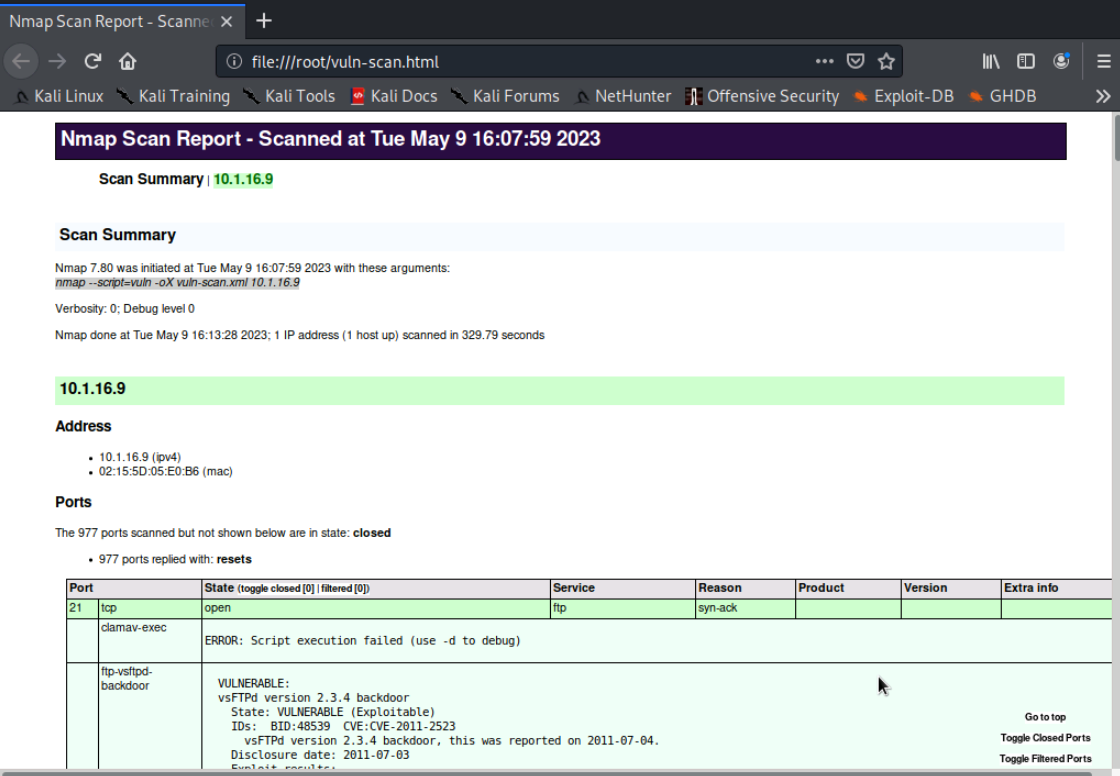
Here, we can see that the first CVE we've found is CVE-2011-2523.
Conclusion
This lab focuses on performing a vulnerability scan on a target and analyzing the output of the scan results using Nmap. The scan provided details information on the OS fingerprinting and service and version detection of the target. By redirecting the output to a file, we were able to compare the default scan results with the scan results of all ports using the diff command. Additionally, we learned about different output format options for Nmap scans, including XML and HTML.
0 Comments Add a Comment?